[Fixed] Digipass battery replacement.
Digipass battery replacement [FIXED]
Please carefully follow these easy steps to successfully operate a Digipass battery replacement.
My 3.3V cell token dongle provided from HSBC needs to be replaced. Even if I only use it twice a month during the past 2 years and for about 20 seconds; it already displays the infamous battery low level.
The Digipass screen is showing the scary “bAtt 02” message.
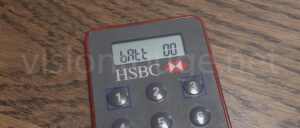
According to HSBC website; this means only 2 months of time left. If temperature drops, it may actually be way less than this.
Mine shows the following week the “Batt 00” message without any use in between.
Option zero. The classic : Trash it -> Order a new one.
We are now under a society where a device runs out of battery, the only proposed option is to order a new one and send the current one to trash.
It’s a wrong business model to start with. Similar to Canon did with the R5 where limitation is part of the original design.
But with Covid 19, most of the physical bank services are closed and going out should be reduced to a minimum.
One replacement possibility is to receive it by mail with an uncertain delivery time. You don’t go out, but someone will do it for you.
Worst; my company address being located in China, I will need to go there to pick it up, which is simply not possible at the moment. This kills the entire idea of online-banking if you can’t remotely do your bank operation.
The second option would have been to go to one local corporate bank branch and request a new device.
You need to come back again a few weeks later to pick it up. You will be charged extra for this service. (It’s more expensive to go yourself pick it up then getting it delivered due to HSBC policies).
But due to the pandemic, this is again something not recommended to do.
You also need to put in perspective the time and money spent on traveling back and forth when health advice is to limit your outdoor time as much as possible.
I went to all these steps before and there are also quite few phone calls to give in order to activate the device. My main point is that changing a full device, with all security steps and trips that will include it is quite insane when we are just talking of changing a token device battery.
Why can’t this be done in an instant as any cheap calculator? Why do not include a tiny solar panel to make sure we can always get connected?
Step one, What is inside the HSBC bank dongle device?
As usual, Google will be the best way to do research. I’m looking for past experiences and pictures of previous HSBC dongle tear-down.
Many videos showing how the token generator looks from the inside. The most important information is the fact that losing power, even for a few seconds, will void the device.
It shows pretty much all you need to start doing it on your side. The mobile security keypad is on one side and the battery cell on the other side.
The battery is a CR2016 coin cell working under 3.3V.
I’m not sure what is the HSBC digipass power consumption at sleep, but it should not be low after only 2 years.
The exact security name is “Digipass 270”.
What are the risks when replacing the Digipass 270 security authentication device?
In the worst case scenario where you battery replacement fails, you will have to order a new one which is exactly the same scenario you are facing anyways.
CR2016 or such 3.3V coin cells are about 4USD and widely available around the corner or online here. If you fail your teardown or battery connection; you will be down on this item and your time.
The main issue is to lose the battery power for even a few seconds or do a short-circuit. It’s a very weird design to get a battery holder but no way to replace the battery.
There is a RTC internal clock that may stop or get reset if the power is lost.
I would suggest their engineer use a simple battery back directly soldered to the board to save money as the enclosure shape does not allow any replacement either.
In a wider perspective; not including a tiny capacitor to let the user replace the battery within a minute or so is also a weak design.
I guess they have a great market with so many bank accounts that will re-apply for a new device every 2 years. Whatever the cost for the planet as soon as they are making money.
Step two, What are the options to fix the bank dongle battery?
It’s obvious that the device should never run completely out of power, so you will need a backup battery to take over during the time you are patching the original battery.
If you wait too long and there is no more display on the screen; it may be too late to use this fix.
One possible option is to plug another 3.3V battery in parallel, either the same CR 2016, or a larger CR2032 (or whatever +3.3V power source, actually).
But when you do so, you may not need to remove the original dead battery! you are already done fixing it this way. You could tape on the back of your dongle the extra power pack and keep rolling for a few years this way.
The second option starts the same way by putting a backup battery, breaking even more the casing and exchanging the original one, and finally removing the backup.
It’s up to you to go both ways. The full replacement will give you more power as the old battery will drain power from it if you keep it in place.
Step 3, prepare digipass battery backup.
You can put there any 3V battery pack. Even put 2 x AA battery holders and link them in serial.
In this digipass battery replace example, I will use 2 similar CR2016. One will be attached to get a backup during the time I will slide the new one.
![Digipass battery replacement [FIXED] Digipass battery replacement [FIXED]](https://www.visionrouge.net/wp-content/uploads/2020/09/Digipass-battery-replacement-FIXED-300x141.jpg)
I need to make sure I do not lose power when crushing the bank dongle enclosure, You need solid solder points per cable.
Do not overheat the battery when soldering.
Step 4, Peel the sticker on the back of the device,
There is almost nothing connected to the back, so a simple blade should suffice to lift it.
![Digipass battery [FIXED] Digipass battery [FIXED]](https://www.visionrouge.net/wp-content/uploads/2020/09/Digipass-battery-FIXED-300x148.jpg)
The original specifications states that the bank authentication pad is waterproof IPx7 (1 meter during 30 min).
Peeling the sticker on the back may void that amazing capability.
![bank dongle battery replacement [FIXED] bank dongle battery replacement [FIXED]](https://www.visionrouge.net/wp-content/uploads/2020/09/bank-dongle-battery-replacement-FIXED-300x165.jpg)
As you can easily see, even if the battery is held on a removable metallic enclosure, the plastic around it forbids you to do so. There is not really a logical explanation there.
On mine, the plastic cover avoids me from seeing the actual connector. One some videos I found, it was a bit more open.
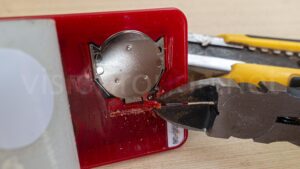
One part of the job is to grid a bit of the plastic to get access to the main connector on the board.
I’m using such plier as it have a flat bottom, so you can really cut very close to the cell.
Be very careful to not let your blade touch the board or short circuit the connector by touching plus and minus poles.
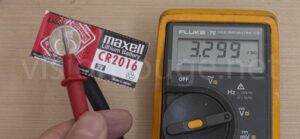
You can at this point confirm the voltage drop on the old Digipass battery.
![token dongle battery replacement [FIXED] token dongle battery replacement [FIXED]](https://www.visionrouge.net/wp-content/uploads/2020/09/token-dongle-battery-replacement-FIXED-300x146.jpg)
3.3Volts is full, 2.9V is empty according to these nice bank people.
The regular calculation is a 10% drop which is 2.7V, not 2.9V.
I’m using an old and solid Fluke multimeter. If you like something that you will keep 30 years, there is now the Fluke 115that should be similar to this one. you can have it online here https://amzn.to/2SpdbQt .
You need one with the bar meter so you can see the voltage fluctuation. A cheap but not so bad options is something from China that is not a simple EOM rebranded product. UNI-T have it’s own factory and many acceptable product. You have a nice multimeter to buy online here https://amzn.to/3vnz6VE . It have the NCV function that let you know if a wire is powered just by approaching the meter to the cable which is quite useful.
Step 4 Connect your backup power
This is the delicate point. Hopefully, the power coming from the coin cell is done with large metallic connectors and are easy to access.
You need first 2 larger holes to access to the two pins connector that are located on the bottom of the cell.
Here is how will look your backup 3.3V cell.
![token dongle battery [FIXED] token dongle battery [FIXED]](https://www.visionrouge.net/wp-content/uploads/2020/09/token-dongle-battery-FIXED-300x153.jpg)
These connectors have a mechanical and electrical function. Do not overheat to avoid them flying away…
You may need to connect one positive and one negative cable in any order you like.
These little tips are part of a simple cable set from my Arduino crew. You can’t go wrong having this set in your drawer.
To be better safe than sorry, I actually wrote where is plus and minus to avoid stupid inversion. Trust me, I went there before.
I’m a big fan of using camera tape, which is very similar to masking tape. I always have a roll to mark my tools and other remarks when my head is focusing on other things.
![Digipass bank [FIXED] Digipass bank [FIXED]](https://www.visionrouge.net/wp-content/uploads/2020/09/Digipass-bank-FIXED-300x167.jpg)
I also put the coin cell in a plastic bag to avoid touching anything.
Success! You can check now if your device is still working. If you still see the low power error message, something is not right.
If all is working fine for me, you may want to put the back sticker again and tape it with masking tape until the next 3 years replacement process. This is the easy way to get it done
Step 5, remove the low power coin cell.
This step is optional but better for a long duration fix. It consists of grinding the metal enclosure to let the old coin cell go out of the dongle.
The full metallic plate is linked to the positive 3.3V of the cell. Make sure you don’t shortcut anything when doing this operation.
You can use a plier as this one for such. It have to be very thin at the to to just lift the metal a bit and cut it.
![Digipass bank token [FIXED]](https://www.visionrouge.net/wp-content/uploads/2020/09/Digipass-bank-token-FIXED-300x149.jpg)
The cover opens up when lifting it up very gently.
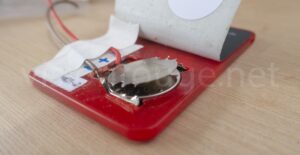
You can now flip the backup coin in place or put another one. make sure it does not touch the plus and minus connector when doing so.
The same attention is necessary to push back the new battery. Do not use metallic pliers as you will connect the plus and minus together.
This fiberglass reinforced plastic pliers may be overkill on this project, but still a great tools when dealing with battery or solar panels.
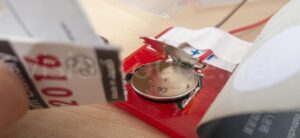
I’m just using the cardboard to slowly push it inside.
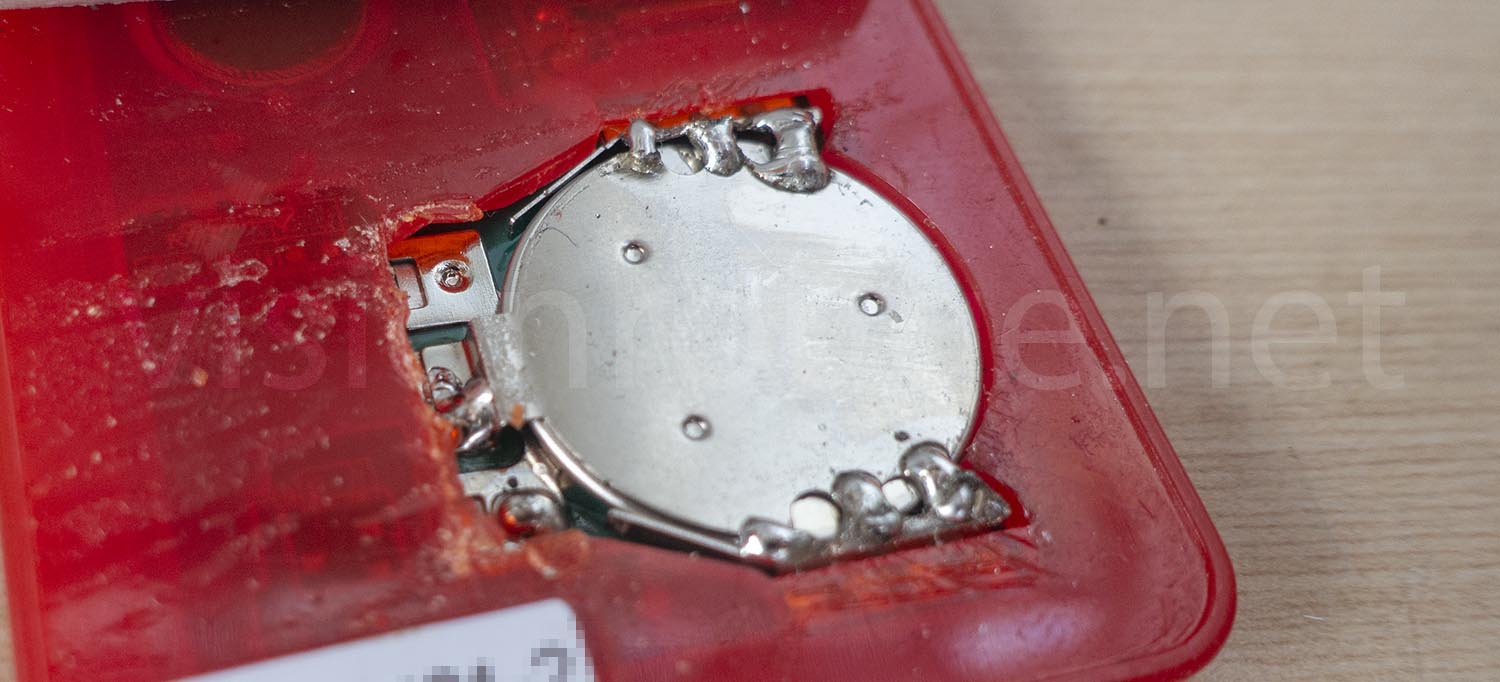
The last operation is to make sure it does not move anymore, either with extra soldering or simply tape it.
![bank token battery replacement [FIXED] bank token battery replacement [FIXED]](https://www.visionrouge.net/wp-content/uploads/2020/09/bank-token-battery-replacement-FIXED-300x150.jpg)
You can now remove the backup battery wire.
Congratulations, you just managed a full battery replacement on your bank identification device.
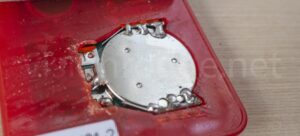
You save yourself 20 phone calls asking you 5 new passwords, at least 2 trips to the bank corporate branch, one month wait and less plastic in the trash tonight.
Please dispose of the old Lithium coin to a dedicated bin for recycling.
The final product looks like it just had a good dinner.
Side note on this security dongle battery replacement post.
Big thanks to these who put their own experience disassembling their bank token generators, it has been a great help here.
Compass, HSBC and many other banks are using this same digipass token generator.
The company producing this “use and trash it” is Vasco, which is now called “OneSpan”.
You can download the product presentation from Vasco here.
It seems Digipass 205 and 260 batteries can also be fixed the same way, I guess many more bank dongles are powered the same.
It says a battery should give you about 5 years of use. My HSBC security log-in device started to display the low level battery message after less than 2 years.
Another way to get rid of this security bank dongle device would have been to use the HSBC app instead. Unfortunately, it does not install on Android rooted devices like mine. I have other bank accounts with other bank apps and HSBC HK is the only one with this limitation.
This DIY battery hack is quite simple and presents 0 risk of arming yourself.
If you have different models, you may need to open it with a tiny screwdriver more than just peeling the sticker.
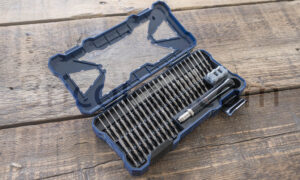
I have invested on a very very nice set to basically open any device I can find in front of me. I posted a review here because it’s quite surprising offer for the price.
You can order it directly here on Amazon or copy and past this link: https://amzn.to/3fHg9Zv
At worse, you will be touching the plus and minus of the battery and the experience will be over.
Feel free to comment below and, please, just click on the google Advertising on top of this page to thank me if this was helpful for you. 5 seconds of you time for 5 cent in my pocket for new tools!
Update on April 2033: My token is still up and running! much longer than the original one.
What do you need to fix the infamous battery error?
You are in the middle of nowhere and no way to get these simple item?
Time to order from my affiliate link and a great way to thanks me!
CR2016 battery cell
Simple iron soldering station
Cutting Pliers
.

![Digipass battery replacement [DIY] Digipass battery replacement [DIY]](https://www.visionrouge.net/wp-content/uploads/2020/09/Digipass-battery-replacement-DIY-300x136.jpg)